Roofing Safety

Roofing safety is of utmost importance to prevent accidents and injuries while working on rooftops. Whether you’re a professional roofer or a homeowner performing DIY repairs, it’s essential to follow safety guidelines to minimize risks. Here are some key safety practices to keep in mind when working on roofs:

roofing safety

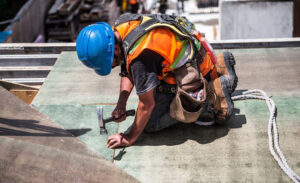
  1. Use proper safety equipment: Always wear appropriate safety gear, including a hard hat, non-slip footwear, gloves, and eye protection. Additionally, use a fall protection harness and secure yourself to a sturdy anchor point when working at heights.
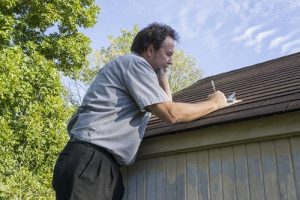
  2. Inspect the work area: Before starting any roofing work, inspect the roof for potential hazards such as loose shingles, weak spots, or debris. Clear the work area of any obstacles and ensure there are no power lines overhead.
  3. Check the weather forecast: Avoid working on the roof during inclement weather conditions such as rain, high winds, or icy conditions, as these can increase the risk of accidents and falls.
  4. Use proper ladder safety techniques: When accessing the roof, use a sturdy ladder that extends at least three feet above the roof edge. Secure the ladder at the base and use ladder stabilizers if necessary. Always maintain three points of contact when climbing or descending the ladder.
  5. Practice safe lifting techniques: When carrying materials or equipment onto the roof, use proper lifting techniques to avoid strain or injury. Bend your knees, keep your back straight, and lift with your legs rather than your back.
  6. Be cautious of roof edges: Exercise caution when working near roof edges, as they pose a significant fall hazard. Install temporary barriers or warning lines to prevent accidental falls, and avoid stepping on or near roof edges whenever possible.
  7. Secure tools and materials: Keep tools and materials securely fastened to prevent them from falling off the roof and injuring workers or bystanders below. Use tool belts, buckets, or tethering systems to secure items while working.
  8. Communicate with coworkers: If working as part of a team, maintain clear communication with coworkers to coordinate tasks and avoid accidents. Use hand signals or two-way radios to communicate effectively, especially in noisy environments.
  9. Take breaks and stay hydrated: Roofing work can be physically demanding, so take regular breaks to rest and rehydrate, especially on hot days. Avoid working in extreme heat or direct sunlight for extended periods.
  10. Receive proper training: Ensure that all workers are adequately trained in roofing safety procedures and techniques before starting work on the roof. Provide ongoing training and supervision to maintain a safe work environment.

By following these roofing safety guidelines, you can reduce the risk of accidents and injuries while working on rooftops. Prioritizing safety not only protects workers from harm but also ensures the successful completion of roofing projects with minimal disruptions.

How To File A Roof Damage Insurance Claim

Roof InspectorIf you’ve experienced roofing damage, filing a claim with your insurance company can help cover the costs of repair or replacement.  But before you start the process you need to understand your coverage. Homeowners insurance is a type of insurance policy that provides financial protection for your home and personal property in case of damage or loss. It’s important to understand what homeowners insurance covers and what it does not cover.  The part of your policy we are concerned with here is dwelling coverage.  It covers the cost of repairing or rebuilding your home if it’s damaged or destroyed by covered events, such as fire, wind, or hail. It typically covers the structure of your home, including the walls, roof, and foundation.

Most homeowner policies will not cover damage caused by earthquakes. You may need to purchase a separate earthquake insurance policy to protect against this type of damage.  Also they won’t cover wear and tear on your home.  It is not intended to cover the cost of normal wear and tear such as degraded shingles, rotted soffits, or sagging roofs due to age or poor construction. This type of damage is typically not covered by insurance.  However, if your roof has been damaged by a storm, heavy wind or hail, then many policies will offer some or total coverage.

Here are the steps to follow when filing a roofing damage claim:

Assess The Roof Damage

  • Before filing a claim, it’s important to assess the damage to your roof. Look for signs of missing or damaged shingles, leaks, or other damage that may have been caused by wind, hail, or other weather events.

Review your policy

  • Also before filing a claim, review your insurance policy to understand what’s covered and what’s not. Some policies may have exclusions for certain types of damage or may require a higher deductible for roof damage.

Contact your insurance company

  • Call your insurance company and let them know that you need to file a claim for roofing damage. Be prepared to provide information about the damage, including when it occurred, and any pictures or video you may have.
  • Schedule an inspection: Your insurance company may send an adjuster to inspect the damage and determine the cost of repairs or replacement. Be sure to ask for a copy of the inspection report.

Get estimates

  • While you’re waiting for the adjuster to arrive, get estimates from at least three licensed and insured roofing contractors. Be sure to ask for detailed written estimates that include the cost of materials, labor, and any permits or fees.

File the claim

  • Once you have all the necessary information and estimates, file the claim with your insurance company. Be prepared to provide all the necessary documentation, including the inspection report and estimates from contractors.
  • Follow up: After filing the claim, follow up with your insurance company to ensure that the process is moving forward. Be sure to keep all documentation and communication in case you need to refer back to it.

Remember, you have been paying a sizable premium to the insurance company every year. When there is damage to any part of your home that is covered by the policy don’t hesitate to contact your insurance company. Filing a roofing damage claim can help cover the costs of repairs or replacement. Be sure to assess the damage, contact your insurance company, schedule an inspection, get estimates, review your policy, file the claim, and follow up to ensure the process is moving forward. By following these steps, you can help ensure that your roofing damage claim is handled smoothly and efficiently.

Residential Roof Systems

A residential roof system is an essential part of any home, as it protects the structure and its inhabitants from weather elements, such as rain, snow, wind, and sunlight. In this article, we will discuss the various types of residential roof systems, their components, and maintenance requirements.

Types of Residential Roof Systems:

shingle roof
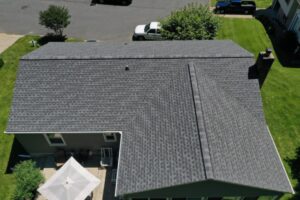
There are several types of residential roofing systems, including:

  1. Asphalt Shingle Roof: This is the most common type of residential roof system, with over 80% of homes in the United States using it. Asphalt shingles are affordable, easy to install, and come in a variety of colors.
  2. Metal Roof: A metal roof is a durable and energy-efficient option. It can withstand severe weather conditions and has a lifespan of 50-75 years.
  3. Tile Roof: A tile roof is a stylish and durable option that can last over 100 years. It is resistant to fire and can withstand high winds. You can check out the pros and cons of tile roofing here.   https://www.thespruce.com/pros-and-cons-of-tile-roofing-1824684
  4. Slate Roof: A slate roof is a high-end option that can last over 100 years. It is resistant to fire and can withstand high winds.

Components of Residential Roof Systems:

A residential roof system consists of several components, including:

  1. Decking: The roof decking is the foundation of the roof. It is typically made of plywood or OSB (oriented strand board).
  2. Underlayment: The underlayment is a layer of moisture-resistant material that is placed over the decking. It acts as a barrier between the decking and the roofing material.
  3. Flashing: Flashing is a metal or plastic material that is installed around roof penetrations, such as chimneys and vents. It helps to prevent water from seeping into the roof system.
  4. Shingles: Shingles are the top layer of the roof system. They come in a variety of materials, including asphalt, metal, tile, and slate.

Maintenance of Residential Roof Systems:

To ensure the longevity and durability of a residential roof system, proper maintenance is necessary. Here are some tips for maintaining a residential roof system:

  1. Inspect the roof regularly: Check the roof for signs of damage, such as missing or cracked shingles, leaks, and sagging.
  2. Clean the gutters: Remove debris from the gutters to prevent water from backing up and causing damage to the roof.
  3. Trim overhanging branches: Overhanging branches can damage the roof during high winds and storms. Trim them back regularly.
  4. Hire a professional: Hire a professional roofer to inspect the roof at least once a year and make any necessary repairs.

In conclusion, a residential roof system is an essential part of any home. Understanding the different types of roof systems, their components, and maintenance requirements can help homeowners make informed decisions about their roofing needs. Proper maintenance is crucial for the longevity and durability of a residential roof system.

Architectural Shingles Or 3-Tab Shingles, Which Should You Choose?

roofing shingles

Because of their reduced cost and simple installation Asphalt shingles are a roof covering staple in North America. Currently they outpace all other roof covering materials by a considerable margin. Asphalt shingles are manufactured in 2 different kinds: three-tab and architectural.

Three-tab and Architectural Shingles Differences

Three-tab shingles are distinguished by cutouts– tabs– made along their long lower edge. This creates the illusion that “each tile looks like three separate items when installed, yet it’s just one.” Three-tab tiles have been around a long period of time and are still one of the most economical and popular tiles today, given their ease of setup and large range of colors.  However, during the 1980s, technical developments as well as changing consumer tastes took asphalt roof tiles to an entire brand-new degree, leading to building laminated shingles. The term “laminated” means that the tile’s construction consists of 2 or even more fundamental tiles laminated or bonded with each other.

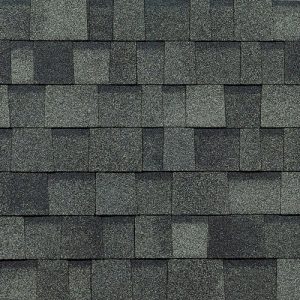
Both laminated roof shingles as well as conventional 3-tab shingles offer efficient defense against wind. They likewise, defend against damaging water infiltration from wind-driven rainfall, offering you improved defense against the elements. In the roof market, laminated shingles tiles are more often described as being “architectural” because they’re specifically engineered to offer dimension to the roof covering by way of each individual roof shingles’ shape, cut and thickness. Therefore, the movement towards 3-tabs to architectural laminated tiles was basically for aesthetic purposes.

Architectural asphalt roof shingles can be made to mimic the remarkable, popular look of authentic cedar or all-natural slate ceramic tiles without the setup, weight, maintenance and flammability fears. In addition, some suppliers’ lines of architectural laminated tiles are readily available in a range of colors. Nonetheless, those lines that are developed to simulate the look of authentic timber shakes or natural slate ceramic tiles will always be limited to the very same color blends as those located in nature; e.g., natural or reddish browns, light as well as dark variants of grey to black.

Architectural laminated shingles are frequently called “high-definition” because of the depth and contour of each shingle. Some manufacturers utilize angled cuts while others make use of a straight cut which boosts the perception of depth as well as the appearance of a shake or tile roof covering. Although the difference between three-tab and architectural shingles seems superficial, roofers consider the latter a much more premium roof covering product because of price difference. Architectural shingles can set you back 20% to 40% percent more than three-tab roof shingles– a difference that can add up to $1500 more for larger roof coverings.

So are architectural roof shingles truly worth the added price? Some roofers say yes and here’s why:

Aesthetic Appeal

Architectural shingles can be made to resemble premium roof covering materials like cedar and also slate and are much better able to conceal flaws on the roof covering surface area.

Longevity

Architectural shingles are almost two times as thick as three-tab roof shingles and therefore extra sturdy and less susceptible to crinkling.

Weight and wind resistance

Three-tab tiles normally rate at 240 lbs per square and are ranked for wind acceleration to 60 miles per hour; architectural tiles rate at 340-440 lbs per square but are ranked for wind durability 80-120 mph.

Producer’s service warranties

25 years for three-tab, 40 to 50 years for architectural.

So is more affordable better? The response will certainly depend upon how you look at it. Three-tab roof shingles are cheaper upfront, but over the course of your roofing’s lifetime, Architectural roof shingles can cost less.

When choosing a roof always keep in mind that the main purpose of any roof covering is to shield your household, your home and its valuable materials from any types of weather conditions. Your decision, therefore, should be based on the environment you live in as well as the architectural style of your home. How much time you reside in your house and what the neighboring houses look like should also be considered and last but not least, your budget.